Transferring photos and videos from your iPhone to your computer is essential to free up valuable storage space on your device. This comprehensive guide will walk you through three reliable ways to do so without losing quality or metadata.
Whether you prefer a direct connection, cloud-based solution, or specialized software, this article covers all the essential techniques for seamless photo transfer. By the end of this guide, you’ll be able to efficiently manage your iPhone photo library and maintain organized collections across your devices.
You’ll learn ways to handle both photos and videos in various formats, including Apple’s HEIC format, which can sometimes cause compatibility issues with Windows computers.
To move your cherished iPhone photos to your computer, you’ll need to understand your transfer options. Transferring photos is not just about moving files; it’s about accessing, organizing, and preserving your memories across different devices.
Why You Might Need to Transfer Photos
Photos are precious memories stored in digital format. Regularly transferring them from your iPhone to your PC helps free up storage space on your device, creates backups of cherished moments, and organizes your growing photo collection on a larger device. By default, your iPhone saves images in HEIC format, which may not be compatible with all computers.
Preparing Your iPhone for Photo Transfer
Before starting the transfer process, ensure your iPhone is sufficiently charged, updated to the latest iOS version, and has an active screen unlock. This preparation authorizes the connection between your iPhone and computer, making the transfer process smoother.
The basic equipment needed includes a compatible USB cable (Lightning to USB or USB-C) and sufficient storage space on your computer. Depending on your chosen method, you might also need iTunes or iCloud setup. Understanding these requirements helps you prepare for a seamless transfer.
Transfer Method
Required Equipment
Preparation Needed
USB Cable
Lightning to USB or USB-C cable
iPhone charged and unlocked
iCloud
iCloud account
iCloud Photos enabled
Third-party Software
Software installation
Software setup and configuration
How to Copy Photos from iPhone to PC Using USB Cable
Transferring photos from your iPhone to your PC is a straightforward process when using a USB cable. This method is efficient and doesn’t require any additional software or cloud services. By connecting your iPhone directly to your Windows PC, you can easily access and transfer your photos.
Connecting Your iPhone to Windows PC
To start, connect your iPhone to your Windows PC using a Lightning to USB or USB-C cable. Ensure you’re using the original Apple cable or a certified alternative for reliable connectivity. Upon connection, unlock your iPhone and tap “Trust” or “Allow” when prompted to trust the computer.
Using Windows Explorer to Access Photos
Windows offers two main methods for accessing your iPhone photos. Using Windows Explorer allows for manual file management. To do this, navigate to “This PC” after connecting your iPhone, locate your device, and open the DCIM folder. You can then copy and paste the photos to your desired folder location on your PC.
Using Windows Photos App to Import Images
The Windows Photos app provides a more streamlined experience for importing photos. Launch the Photos app, click “Import” in the top-right corner, and select “From a connected device.” Choose the photos you want to import and click the “Import” button. The Photos app will organize your photos by date in your Pictures folder by default.
Troubleshooting Connection Issues
Common issues during the transfer process include unrecognized devices, trust relationship problems, or cable connectivity issues. To resolve these, ensure you have iTunes installed, reset your location & privacy settings if necessary, or try a different USB cable. For optimal compatibility, consider changing your iPhone camera settings to “Most Compatible” format.
After completing your transfer, always properly eject your iPhone before disconnecting the cable to prevent potential data corruption. By following these steps, you can efficiently transfer your photos from your iPhone to your Windows PC using a USB cable.
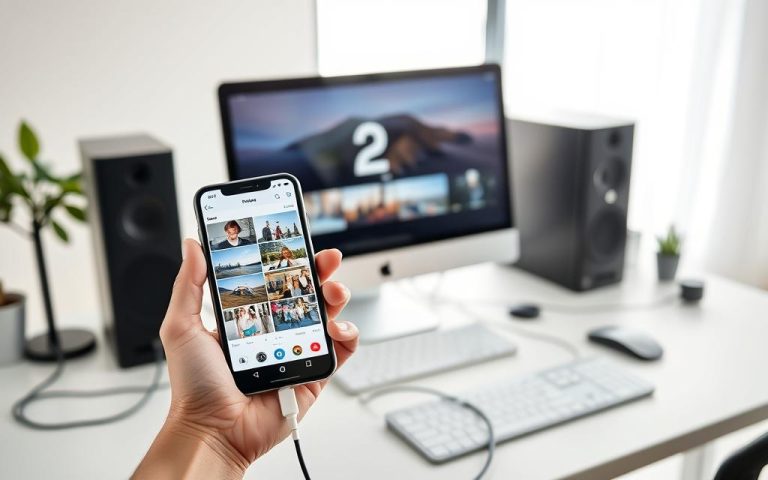
With iCloud Photos, you can easily transfer your iPhone photos to your PC without cables. This wireless solution allows you to access your entire photo library across all your Apple devices and on your Windows computer.
Setting Up iCloud Photos on Your iPhone
To begin using iCloud Photos, you’ll need to activate the feature on your iPhone by going to Settings > [Your Name] > iCloud > Photos and toggling on “iCloud Photos.” This will automatically upload your iPhone photos and videos to the cloud.
Accessing iCloud Photos on Your PC
For Windows PC access, download and install the iCloud for Windows application from the Microsoft Store or Apple’s website. Sign in with your Apple ID credentials to access your iCloud Photos.
Downloading Selected Photos vs. All Photos
When accessing photos through iCloud for Windows, you can selectively download individual photos or entire albums to your PC. This gives you flexibility in managing storage space on your computer.
Managing Storage and Photo Quality
Be mindful that iCloud Photos uses your iCloud storage allocation. Managing photo quality settings in iCloud allows you to balance storage usage against image quality. You can choose to optimize storage on your devices while maintaining originals in the cloud.
iCloud Photos preserves your original, full-resolution photos and videos. You can keep full-resolution originals on each of your devices or save space with device-optimized versions instead.
For users seeking more control over their photo transfer process, third-party applications offer a robust solution. These software options provide advanced features that go beyond the capabilities of standard Windows tools, making it easier to manage and transfer your iPhone photos to your PC.
Popular Photo Transfer Applications
Several third-party applications have gained popularity for their ease of use and feature-rich interfaces. Applications like CopyTrans Photo, iMazing, and WinX MediaTrans are highly regarded for their ability to transfer photos from iPhone to PC efficiently.
Benefits of Using Specialized Software
The primary advantage of using specialized software is the ability to preserve your iPhone’s album structure, ensuring that your carefully organized photo collections remain intact when transferred to your computer. Additionally, many third-party tools can automatically handle format conversion, such as transforming HEIC photos into more Windows-compatible JPEG files during the transfer process.
Step-by-Step Transfer Process
The typical transfer process involves installing the software, connecting your iPhone via USB, selecting the desired photos or albums from a visual interface, choosing a destination folder, and initiating the transfer with a single click. For instance, with CopyTrans Photo, you can download and install the program, connect your iPhone, and then click on the “Full Backup” button to transfer all your iPhone photos and albums at once.
Using third-party software for photo transfer not only simplifies the process but also provides additional features such as batch processing, automatic duplicate detection, and selective syncing options. These features make it an ideal solution for users with large photo libraries or specific organizational needs.
Conclusion
With three effective methods at your disposal, you can easily manage your iPhone photos on your PC. You’ve explored direct USB connection, iCloud Photos, and third-party software solutions, each offering distinct advantages. When choosing a method, consider factors like photo library size and transfer frequency. For optimal results, ensure your devices are updated and consider setting your iPhone camera to “Most Compatible” format. Regular backups are crucial; visit this resource for more information on transferring photos from iPhone to PC.
FAQ
What is the easiest way to transfer photos from my iPhone to my Windows PC?
You can use a USB cable to connect your iPhone to your PC and transfer photos using Windows Explorer or the Windows Photos app.
Can I transfer photos from my iPhone to my PC without using a cable?
Yes, you can use iCloud Photos to transfer photos wirelessly. Simply set up iCloud Photos on your iPhone and access your photos on your PC by visiting the iCloud website.
What should I do if my PC doesn’t recognize my iPhone when I connect it using a USB cable?
Try restarting both your iPhone and PC, then reconnect them. If the issue persists, ensure that your USB cable is not damaged and that you have the latest version of iTunes installed on your PC.
Can I select specific photos to transfer from my iPhone to my PC?
Yes, you can use the Windows Photos app to select and import specific photos from your iPhone. You can also use iCloud Photos to download selected photos or all photos to your PC.
Are there any third-party software options available for transferring photos from my iPhone to my PC?
Yes, there are several third-party software options available, such as specialized photo transfer applications, that can simplify the transfer process and offer additional features.
Will transferring photos from my iPhone to my PC delete them from my iPhone?
No, transferring photos from your iPhone to your PC will not delete them from your iPhone. However, it’s always a good idea to back up your iPhone regularly to prevent data loss.
Understanding your computer’s specifications is crucial for ensuring software compatibility, planning hardware upgrades, and troubleshooting performance issues. Your system’s specs provide vital information about its capabilities and limitations. This comprehensive guide will walk you through various methods to check your PC specs, from built-in Windows tools to third-party applications. You’ll learn how to find detailed…
HoYoverse’s latest free-to-play action RPG, Zenless Zone Zero, is now available to download on PC without any cost. This comprehensive guide will walk you through the official methods to obtain the game, ensuring a secure and updated installation. The game was officially released on July 4, 2024 (GMT+8) and can be downloaded from the official…
The term Personal Computer has become an integral part of our daily lives. Originally coined to distinguish standalone computing machines for individual users, the term has evolved significantly over the years. The acronym “PC” now encompasses not just desktops and laptops but also advanced hybrid devices used across various industries. As technology continues to advance,…
Transferring photos from your iPhone to your computer is a common task for many users. Whether you’re looking to free up storage space on your device or want to edit and organize your images on a larger screen, having a reliable method for transferring photos is essential. In this comprehensive guide, we’ll explore the most…
Dealing with a slow computer can be frustrating, impacting productivity and user experience. Slow performance is a common issue that can stem from various software and hardware-related causes. This article will provide 10 actionable fixes to improve your computer’s performance. These solutions range from simple, no-cost fixes to more advanced hardware upgrades, making it accessible…
Keeping your computer running smoothly requires regular maintenance, particularly when it comes to drivers. Outdated drivers can lead to performance issues and hardware compatibility problems. Updating your drivers is a straightforward process that can significantly improve your system’s performance. For those wondering how to update drivers on PC, the process involves using built-in Windows tools…


")