Moving photos from your iPhone to your computer is a common task, but it can be daunting with the various methods available. This comprehensive guide is designed to simplify the process for Windows users.
We’ll explore multiple approaches, including wired and wireless transfer options, to cater to different user preferences. Native Windows tools, Apple software, cloud services, and third-party applications will be covered, ensuring you find the best method for your needs.
Whether you’re dealing with file format compatibility issues, like HEIC, or concerned about maintaining picture quality during download, this guide has you covered.
One of the challenges iPhone users encounter is effectively transferring their photos to a Windows PC. This process involves several considerations to ensure that the photos are transferred correctly and remain accessible on the computer.
Why Transfer Photos from iPhone to PC
Transferring photos from an iPhone to a PC offers several benefits. It helps in freeing up valuable storage space on the device, allowing users to store more new photos or apps. Additionally, backing up photos to a computer creates a secondary copy, safeguarding against device loss or damage.
Common Challenges When Transferring iPhone Photos
Windows users often face compatibility issues when transferring iPhone photos due to differences between Apple’s ecosystem and Windows. For instance, the file format used by iPhones is not natively supported by Windows, which can lead to viewing issues.
iPhones save images in HEIC format by default. However, if you import them to a PC, you might see broken icons instead of thumbnails because Windows doesn’t natively support HEIC. To view these pictures, you’ll need tools to convert HEIC images to JPEG format, a more widely supported file type. For more information on HEIC and how to manage it on Windows, you can visit Apple’s Support Page.
Understanding these aspects can help you navigate the transfer process more effectively and choose the right method for your needs. Whether you’re dealing with a large photo library or concerned about preserving metadata, being aware of these challenges is crucial.
How to Transfer Photos from iPhone to PC Using USB Cable
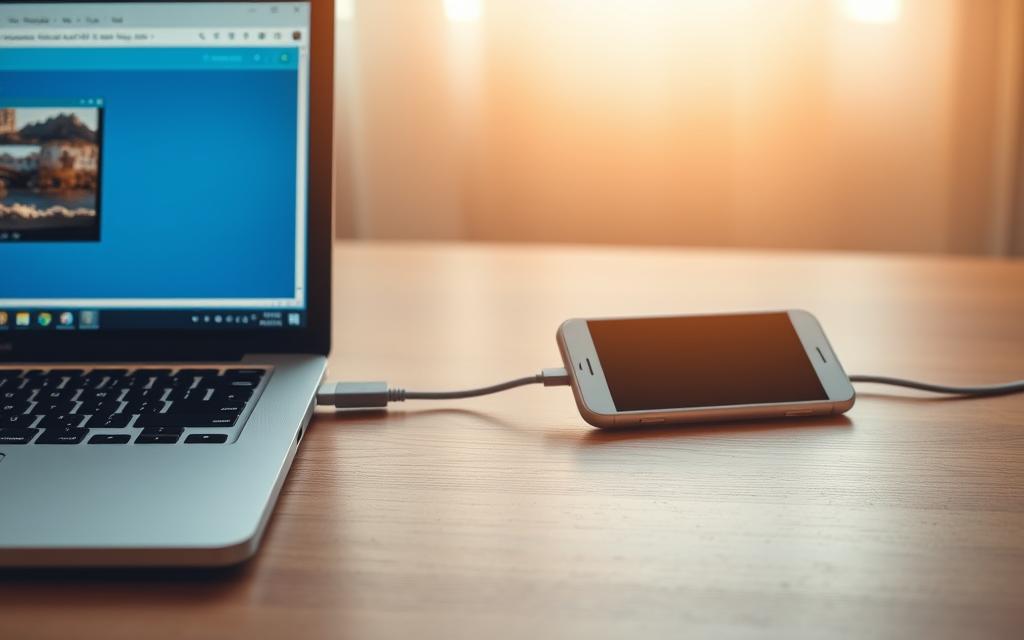
Using a USB cable is one of the most direct methods to transfer photos from your iPhone to your computer. This method doesn’t require any additional software installations, making it a convenient option for Windows users.
Connecting Your iPhone to Windows PC
To start the transfer process, connect your iPhone to your PC using a USB cable. Upon connection, you may need to unlock your iPhone and tap “Trust This Computer” when prompted to establish a trusted connection.
Using Windows File Explorer to Access iPhone Photos
Open File Explorer on your Windows PC, and you should see an icon representing your iPhone. Double-click on it to access your device’s contents, then open the DCIM folder, which contains all your iPhone photos and videos.
Step-by-Step Guide to Copy Photos to Your Computer
Select the photos you want to transfer, right-click on them, and choose Copy. Navigate to your desired folder on the PC, right-click again, and select Paste to complete the transfer.
Troubleshooting Connection Issues
If you encounter issues, try updating your iOS, reinstalling Apple drivers, or using different USB ports and cables. This method is effective for smaller photo collections but may be cumbersome for larger libraries.
iTunes offers a straightforward method for transferring photos between your iPhone and Windows PC. As a native Apple solution, it allows you to manage various files, including photos, music, and videos.
Setting Up iTunes for Photo Transfer
To start transferring photos, you’ll need to download and install iTunes from Apple’s website if you don’t already have it on your computer. Once installed, you can set up iTunes to sync your iPhone photos.
Step-by-Step Photo Import Process
The photo sync process in iTunes allows you to select specific folders from your computer to sync with your iPhone. To do this, connect your iPhone to your PC, open iTunes, and select your device. Then, navigate to the “Photos” tab and choose the folders you want to sync.
Limitations of Using iTunes
One significant limitation of iTunes is that it syncs entire photo libraries rather than allowing selective transfers of individual photos. Additionally, the iTunes photo sync process can potentially overwrite existing photos on your device if not configured correctly.
Despite its limitations, iTunes provides a reliable way to maintain consistent photo libraries across your devices if you’re already integrated into the Apple ecosystem.
iCloud provides a convenient wireless solution for transferring photos between your iPhone and Windows PC. This method allows for automatic synchronization of your photos across devices, making it ideal for those who want ongoing access to their photos without the hassle of cables.
Setting Up iCloud Photos on Your iPhone
To start, you need to enable iCloud Photos on your iPhone. Go to Settings > [Your Name] > iCloud > Photos and toggle on iCloud Photos. This step ensures that your iPhone photos are synced with your iCloud account.
Installing and Configuring iCloud for Windows
Next, download and install the iCloud for Windows app from the Microsoft Store. Once installed, sign in with your Apple account details. You will see various options to synchronize data with your PC, including contacts, mail, and bookmarks. Select the “Photos” option and click “Apply”. You may be prompted to upload your PC photos to iCloud; click “Done” to proceed.
Downloading Photos from iCloud to Your PC
After configuring iCloud for Windows, your photos will be synced to a dedicated Photos folder on your PC. You can choose to download optimized versions of your photos to save space or download the originals for full quality.
Managing Photo Storage in iCloud
It’s essential to manage your iCloud storage since it offers only 5GB of free storage, which can quickly fill up with photos and videos. Consider upgrading your storage plan if you have a large photo library.
Using iCloud to transfer photos to your Windows PC is a straightforward and efficient method, especially for those who prefer wireless synchronization. By following these steps, you can easily access your iPhone photos on your PC.
Cloud Services for Photo Transfer
Cloud services offer a convenient solution for transferring and synchronizing photos between iPhone and Windows PC. These services eliminate the need for physical connections and cables, making it easier to access your photos across different devices.
Using Google Photos to Sync Between iPhone and PC
Google Photos provides unlimited free storage space for your photos and videos. To use Google Photos, sign in with your Google account on both your iPhone and PC. The Google Photos app automatically backs up photos from your iPhone, which you can then access from any browser on your PC.
Dropbox offers a straightforward folder-based approach to photo transfers. You can create dedicated folders for organizing your images and access them from both your iPhone and PC. Dropbox allows you to share folders and collaborate with others.
Microsoft OneDrive integrates seamlessly with Windows 10/11 and provides 5GB of free storage for your photos and other files. You can access your photos from any device with an internet connection, making it a convenient option for Windows users.
Each cloud service has different storage limits, pricing tiers, and compression policies that may affect your photo quality. Google Photos provides free storage with some compression, while Dropbox and OneDrive offer paid plans with varying storage capacities. When choosing a cloud service, consider your storage needs and budget.
By comparing these services, you can choose the best option based on your existing ecosystem, storage needs, and budget. Whether you prioritize convenience, storage capacity, or compatibility, there’s a cloud service that suits your needs.
Third-Party Apps for iPhone Photo Transfer
For those seeking more control over their iPhone photo transfers, third-party applications offer a robust solution. These apps provide features that often surpass native transfer methods, making the process more efficient and flexible.
Using MobileTrans for Photo Transfer
MobileTrans is a comprehensive tool that allows for the direct transfer of photos from iPhone to PC. It supports up to 18 types of data, including photos, contacts, and music, making it a versatile option for users looking to manage their iPhone data on their computer.
CopyTrans Photo excels at maintaining the album structure of your iPhone when transferring photos to your PC. It also offers the conversion of HEIC photos to JPEG, ensuring compatibility with various devices.
Besides MobileTrans and CopyTrans Photo, there are other reliable third-party apps available for transferring iPhone photos. These apps offer a range of features, including selective transfers, two-way sync, and automatic backups.
Comparing Third-Party Apps: Speed, Features, and Reliability
When choosing a third-party app, consider factors such as transfer speed, user interface, and additional features. While most apps require payment for full functionality, they often offer free trials to test their capabilities.
By leveraging these third-party applications, iPhone users can enjoy a more streamlined and efficient photo transfer experience.
Alternative Methods for Transferring iPhone Photos
When traditional methods aren’t available, alternative approaches can help transfer iPhone photos to a PC. These methods provide solutions when common techniques don’t work or are impractical.
Using Email to Send Photos
Email can be used to transfer photos from an iPhone to a computer. By attaching photos to an email and sending it to oneself, users can access these photos on their PC. However, email services often have attachment size limits, typically around 25MB, and may compress photos, potentially reducing image quality.
Transferring Photos via Bluetooth
Bluetooth is another method, albeit a slower one, for transferring small batches of photos. It requires device proximity and is not suitable for large transfers.
Using AirDrop with a Mac as Intermediary
For users with access to a Mac, AirDrop can be an intermediary step. Photos can be transferred from iPhone to Mac and then from Mac to Windows PC via external drive or network sharing.
These alternative methods are best for transferring a few selected photos rather than entire libraries. While not the most efficient for large transfers, they require minimal technical setup and can work without internet connectivity or specialized software.
Conclusion: Choosing the Best Method for Your Needs
To transfer iPhone photos to PC efficiently, it’s essential to consider your technical comfort level and photo volume. The best method depends on your specific needs, with options ranging from direct USB connections using File Explorer to cloud-based services like iCloud, Google Photos, or OneDrive. For large one-time transfers, USB or third-party apps like CopyTrans are ideal. Cloud services offer automatic synchronization, while direct transfers provide more storage flexibility. Consider factors like photo quality, organization, and additional features when choosing a method. Combining methods can provide a comprehensive solution, ensuring both convenience and backup.
FAQ
What is the best way to download photos from an iPhone to a Windows PC?
The best way to download photos is by using a USB cable and Windows File Explorer. Simply connect your iPhone to your PC, and you’ll be able to access your photos.
Can I use iCloud to transfer photos to my Windows PC?
Yes, you can use iCloud to transfer photos. You’ll need to set up iCloud Photos on your iPhone, install iCloud for Windows, and then download your photos to your PC.
Are there any third-party apps that can help me transfer photos from my iPhone to PC?
Yes, there are several third-party apps available, such as MobileTrans and CopyTrans Photo, that can help you transfer photos from your iPhone to PC.
Can I use Google Photos to sync my iPhone photos with my PC?
Yes, Google Photos is a great option to sync your iPhone photos with your PC. You can download the Google Photos app on your iPhone and PC, and your photos will be synced across devices.
What file format should I expect when transferring photos from my iPhone?
By default, iPhones capture photos in the HEIC format. However, you can adjust your iPhone settings to capture photos in JPEG format instead.
Why can’t I access my iPhone photos when I connect it to my PC?
If you’re having trouble accessing your iPhone photos, try restarting your iPhone and PC, and ensure that your USB cable is working properly. You may also need to trust the device on your iPhone.
Can I transfer videos from my iPhone to my PC using the same methods as photos?
Yes, you can transfer videos from your iPhone to your PC using the same methods as photos, including USB cable, iCloud, and third-party apps.
Are there any limitations to using iTunes to transfer photos?
Yes, using iTunes to transfer photos can be limited by the need to sync your entire photo library, and it may not be as straightforward as other methods.
Apple AirPods are designed to seamlessly integrate with Apple devices, but their Bluetooth capability allows them to connect to Windows PCs as well. This versatility makes AirPods a convenient choice for users across different ecosystems. Our comprehensive guide will walk you through the process of pairing your AirPods with a Windows system. We’ll cover the…
Transferring photos from your iPhone to your computer is a common task for many users. Whether you’re looking to free up storage space on your device or want to edit and organize your images on a larger screen, having a reliable method for transferring photos is essential. In this comprehensive guide, we’ll explore the most…
Gamers often face a daunting question when considering new game purchases: whether their computer can handle the latest titles. Checking system requirements is crucial to avoid wasting money on games that won’t run properly. Understanding your computer’s specifications and the requirements of the game is essential. Fortunately, compatibility checking tools have evolved, making it simpler…
When your computer or device experiences problems, using Safe Mode can be an effective way to troubleshoot the issue. This mode loads only the essential files and drivers, making it easier to identify and resolve system problems. Our comprehensive guide will walk you through the process of accessing Safe Mode across different operating systems, including…
A factory reset is a process that reinstalls Windows and restores your device to its default settings. This can be a useful solution for resolving persistent performance issues, removing malware, or simply starting fresh. Before initiating a factory reset, it’s crucial to back up your important data to prevent loss. Windows 10 and 11 offer…
The Sony DualSense controller, the flagship accessory for the PS5, has revolutionized gaming with its haptic feedback and adaptive triggers. This innovative controller is not just limited to console gaming; it can also enhance your PC gaming experience. With the PS5 controller, you can enjoy your favorite PC games with the comfort and precision it…


")