Apple AirPods are designed to seamlessly integrate with Apple devices, but their Bluetooth capability allows them to connect to Windows PCs as well. This versatility makes AirPods a convenient choice for users across different ecosystems.
Our comprehensive guide will walk you through the process of pairing your AirPods with a Windows system. We’ll cover the necessary steps to ensure compatibility, provide a step-by-step connection guide, and offer troubleshooting tips for common issues. By the end of this guide, you’ll be able to enjoy your AirPods with your Windows PC, leveraging the full potential of Bluetooth connectivity.
Ensuring your AirPods and PC are ready for connection is crucial for a successful pairing process.
Checking PC Bluetooth Compatibility
Most modern Windows systems come with built-in Bluetooth, but older PCs may require an external Bluetooth adapter to establish a connection with your AirPods.
Preparing Your AirPods for Pairing
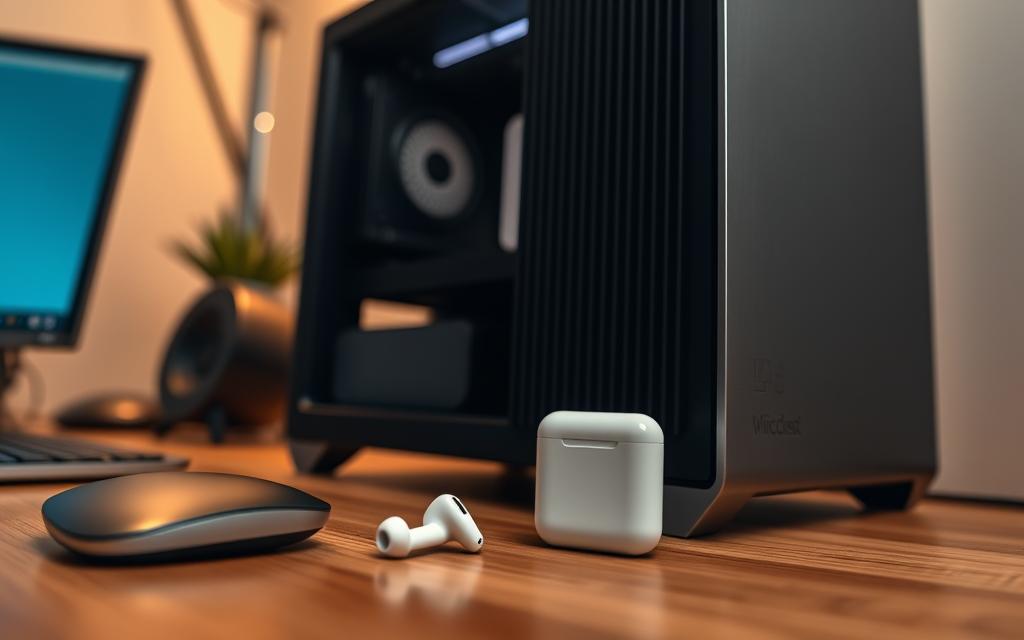
Place your AirPods in their charging case and ensure they have at least 20% battery life. The charging case contains the pairing button needed to initiate the Bluetooth discovery mode.
Required Battery Levels for Successful Connection
Your AirPods should have sufficient battery life (at least 20%) to maintain a stable connection throughout the pairing process.
Verify that your computer has Bluetooth capability.
Ensure your AirPods have at least 20% battery life.
Understand that Apple AirPods are compatible with Windows PCs that have Bluetooth 4.0 or higher.
How to Connect AirPods to PC: Step-by-Step Guide
To enjoy your AirPods with your Windows PC, follow this step-by-step guide. Connecting your AirPods to your PC can enhance your audio experience, whether you’re listening to music, watching videos, or gaming.
Accessing Windows Bluetooth Settings
The first step in connecting your AirPods to your PC is to access the Windows Bluetooth settings. You can do this by pressing Windows + I to open the Settings app, then navigating to the Devices section. Alternatively, you can click on the Start menu and search for “Bluetooth settings.”
Once in the Devices section, click on Add Bluetooth or other device to begin the connection process.
Putting AirPods in Pairing Mode
To put your AirPods in pairing mode, place them in their case, close the lid, and then open it again. Press and hold the setup button on the back of the case until the LED light starts flashing white. This indicates that your AirPods are ready to be paired with your PC.
Selecting and Connecting Your AirPods
With your AirPods in pairing mode, they should appear in the list of available Bluetooth devices on your Windows PC. Select your AirPods from this list to initiate the connection. Windows will then establish the connection and display a confirmation message when successful.
Verifying the Connection Is Working
To verify that the connection is working properly, play some music or video content on your PC. If you can hear the audio through your AirPods, the connection is successful. You can also check the audio output settings to ensure that your AirPods are selected as the default device.
Step
Description
1
Access Windows Bluetooth Settings
2
Put AirPods in Pairing Mode
3
Select AirPods from Available Devices
4
Verify Connection by Playing Audio
Common AirPods-to-PC Connection Issues and Solutions
Troubleshooting AirPods connection issues on your PC can be straightforward with the right steps. When attempting to connect your AirPods, you may encounter several common problems.
AirPods Not Appearing in Bluetooth Devices List
If your AirPods don’t appear in the Bluetooth devices list, ensure Bluetooth is enabled on your Windows PC and that your AirPods are in pairing mode with the LED light flashing. Check that your AirPods are sufficiently charged and try resetting them by placing them in the case, closing the lid for 30 seconds, and then reopening it.
Connection Drops or Audio Quality Problems
Connection drops often occur due to interference from other wireless devices or when your AirPods are at the edge of the Bluetooth range. To resolve this, try moving your PC and AirPods closer together. Audio quality issues may stem from competing Bluetooth connections or outdated Bluetooth drivers on your Windows system. Updating your Bluetooth drivers through Device Manager or the manufacturer’s website can help.
Pairing Button Not Responding
If the pairing button on the back of your AirPods case isn’t responding, try resetting your AirPods. Place them in the case, close the lid for 30 seconds, and then try again. For AirPods Pro, verify that the front LED light turns white during pairing, indicating the device is ready to connect.
Windows Not Recognizing AirPods
Windows not recognizing your AirPods is a common issue that can often be resolved by removing the device from your Bluetooth list and re-pairing from scratch. You can also try using the Windows troubleshooter (Settings > System > Troubleshoot > Other troubleshooters > Bluetooth) to diagnose and fix the problem. For more detailed troubleshooting steps, you can refer to resources like Digital Trends.
How to Disconnect and Remove AirPods from Your PC
Disconnecting your AirPods from a Windows PC is a straightforward process that allows for easy switching between devices. Whether you want to temporarily stop using your AirPods with your PC or completely remove them from the device’s memory, understanding the disconnection process is essential.
Temporary Disconnection Process
To temporarily disconnect your AirPods from your Windows PC, you’ll need to access the Bluetooth settings. Start by going to the Start menu, then navigate to Settings > Devices > Bluetooth & other devices. Find your AirPods in the list of devices and click on them. You’ll see an option to Disconnect; selecting this will temporarily sever the connection between your AirPods and PC. This method is useful if you plan to use your AirPods with another device but intend to reconnect to your PC in the future.
Completely Removing AirPods from Windows
If you wish to completely remove your AirPods from your Windows PC’s memory, you can do so by selecting the Remove device option after finding your AirPods in the Bluetooth settings. This action erases the pairing information, meaning you’ll need to go through the pairing process again if you want to use your AirPods with your PC in the future. This is a good option if you’re experiencing persistent connection issues or if you’re giving your PC to someone else.
Reconnecting to Your iPhone After PC Use
After disconnecting or removing your AirPods from your Windows PC, you might want to reconnect them to your iPhone or other Apple devices. To do this, ensure that Bluetooth is enabled on your iPhone. Then, you can either select your AirPods from the iOS audio output menu or simply place them in your ears to trigger an automatic connection. If you’ve removed your AirPods from your PC and want to reconnect, make sure you’ve paired them with your iPhone previously.
Understanding how to manage your AirPods’ connections across different devices enhances your overall user experience. Whether you’re switching between a Windows PC and an iPhone, being able to disconnect and reconnect your AirPods seamlessly is a valuable skill.
Conclusion
AirPods can seamlessly integrate with Windows PCs, offering a premium audio experience. By understanding the basic steps involved in connecting your AirPods, you can enjoy their high-quality sound across multiple devices. The process involves accessing your PC’s Bluetooth settings, putting your AirPods in pairing mode, and selecting them from the list of available devices.
While some advanced features may have limited functionality compared to using AirPods with Apple devices, the overall experience remains robust. Regular maintenance, such as proper charging and storing your AirPods in their case, ensures optimal battery life and connection reliability. If you encounter any issues, referring to the troubleshooting steps can help resolve them. The flexibility of AirPods to connect to non-Apple devices highlights their value as a premium audio solution. With proper care, your AirPods can transition smoothly between your iPhone, iPad, and Windows PC, providing a consistent audio experience.
FAQ
What should I do if my AirPods are not appearing in the Bluetooth devices list on my PC?
Make sure your AirPods are in pairing mode by opening the charging case and pressing the setup button on the back until the LED light flashes white. Then, check your PC’s Bluetooth settings to see if your AirPods are listed.
Why is my AirPods’ audio quality poor when connected to my PC?
Audio quality issues can be caused by interference or distance from the PC. Try moving your PC and AirPods closer together or restarting your AirPods and PC to resolve the issue.
How do I put my AirPods in pairing mode?
To put your AirPods in pairing mode, open the charging case, then press and hold the setup button on the back of the case until the LED light flashes white.
Can I use my AirPods with multiple devices, including my PC and iPhone?
Yes, your AirPods can be paired with multiple devices. To switch between devices, make sure Bluetooth is enabled on the device you want to use, then select your AirPods from the list of available devices.
What should I do if the pairing button on my AirPods is not responding?
If the pairing button is not responding, try restarting your AirPods by placing them in the charging case and closing the lid. Then, open the case and try pairing again.
How do I remove my AirPods from my PC’s Bluetooth devices list?
To remove your AirPods from your PC’s Bluetooth devices list, go to your PC’s Bluetooth settings, find your AirPods in the list, and select Remove device or Forget device.
The term Personal Computer has become an integral part of our daily lives. Originally coined to distinguish standalone computing machines for individual users, the term has evolved significantly over the years. The acronym “PC” now encompasses not just desktops and laptops but also advanced hybrid devices used across various industries. As technology continues to advance,…
Moving photos from your iPhone to your computer is a common task, but it can be daunting with the various methods available. This comprehensive guide is designed to simplify the process for Windows users. We’ll explore multiple approaches, including wired and wireless transfer options, to cater to different user preferences. Native Windows tools, Apple software,…
Gaming on PC offers a unique experience, and using a wireless controller can enhance it. The DualShock4, designed for the Sony PlayStation4, is compatible with PC games, offering a comfortable gaming experience. This comprehensive guide will walk you through the process of connecting your controller to your Windows PC. We’ll explore both wired and wireless…
Understanding your computer’s specifications is crucial for ensuring software compatibility, planning hardware upgrades, and troubleshooting performance issues. Your system’s specs provide vital information about its capabilities and limitations. This comprehensive guide will walk you through various methods to check your PC specs, from built-in Windows tools to third-party applications. You’ll learn how to find detailed…
Gamers often face a daunting question when considering new game purchases: whether their computer can handle the latest titles. Checking system requirements is crucial to avoid wasting money on games that won’t run properly. Understanding your computer’s specifications and the requirements of the game is essential. Fortunately, compatibility checking tools have evolved, making it simpler…
Gaming on PC has never been more enjoyable, thanks to the comfort and immersion offered by using a PS4 controller. While the traditional keyboard-mouse combo remains reliable, many players prefer the wireless freedom and familiarity of a console controller. This comprehensive guide will walk you through the process of connecting your PS4 controller to your…