Creating a system image backup is a smart way to fix a Windows problem. It keeps your data safe by restoring your system to how it was before. This method makes a full copy of Windows 10 or Windows 11.
System image backup is different from File History and Recovery Drive. It saves the whole system, not just files and folders. This means you can’t pick and choose what to restore. It’s key to back up regularly to keep your system safe.
Following simple steps can keep your computer safe and working well. You need to pick the right place to store the backup, decide which drives to include, and check the system image. These steps are vital for keeping your data safe.
Understanding System Image Recovery: A Comprehensive Overview
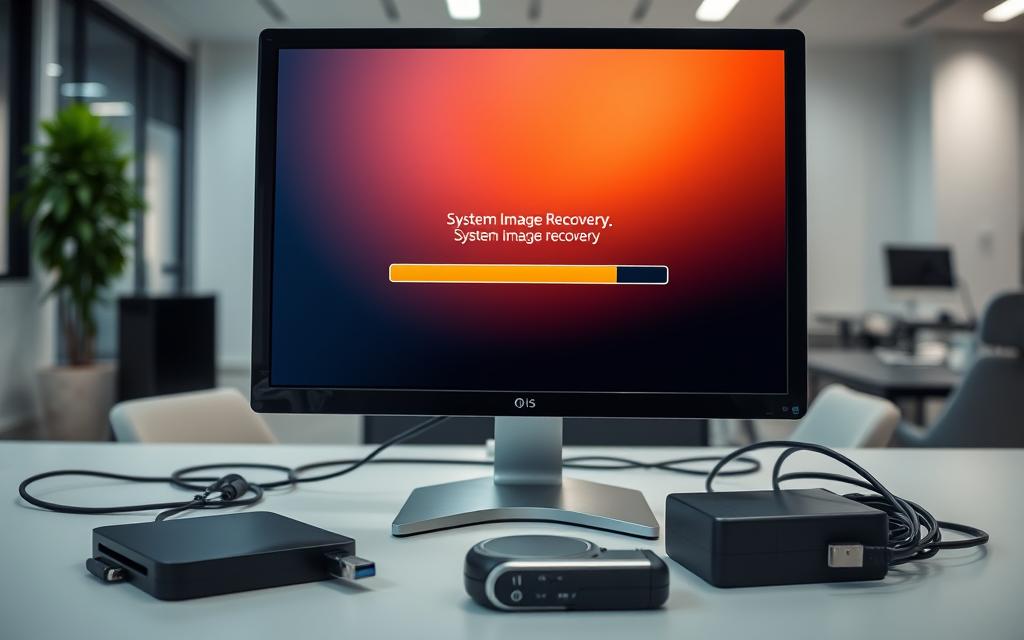
System image recovery is key to getting your computer back to how it was before. It helps keep your data safe and cuts down on lost time. This method makes a system image, which is a full copy of your computer’s setup and files.
A system image has your current Windows, settings, programs, and personal files. It’s vital for fixing a device in a big problem. The backup and restore steps are crucial to keep your system image current and ready for use.
A system image is a snapshot of your computer’s current state. It includes the operating system, apps, settings, and files. Special software makes this image, allowing for a full restore if needed.
Benefits of System Image Recovery
System image recovery has many advantages. It can quickly restore your computer from a backup, cutting downtime to just minutes. It also lets you recover individual files and folders from the backup, which is great for data safety.
When to Use System Image Recovery
Use system image recovery for hardware or software failures, disaster recovery, or malware attacks. It’s also good for bare-metal recovery, which is for machines without an operating system.
Hardware or software failure
Disaster recovery
Malware attacks
Bare-metal recovery
In summary, knowing about system image recovery is vital for keeping your data safe and reducing downtime. By making a system image and using backup and restore methods, you can quickly get your computer back to a previous state. It’s a must-have for any computer user.
Essential Prerequisites Before Starting the Restoration Process
Before starting the system restoration, make sure your computer meets the system requirements. Check if your hardware and software are compatible with the system image you plan to restore. Also, preparing a full system backup is crucial. This can take a while, depending on your data and the storage you choose.
Protecting your data is key. Make sure your backup is ready to avoid losing data during the restore. Schedule backups regularly, like monthly or before big updates. This keeps your system image current and ready for restoration if needed.
Check the system image for any damage
Make sure your storage can hold the system image
Connect your computer to a network for the restore process
By following these steps and preparing your backup and data, you can have a smooth system restoration. This ensures your system meets the system requirements.
Creating a System Image Backup: Best Practices
Creating a system image backup is key to keeping your data safe. It’s important to pick the right storage, choose which drives to include, and check the backup. The storage you choose affects how fast and reliable the backup is.
It’s also wise to follow the 3,2,1 rule for backups. This means having 3 backups, on 2 different mediums, and 1 offsite. Tools like Acronis or Windows’ Backup and Restore make creating and restoring backups easier.
By sticking to these best practices and using the right tools, you can make sure your backups work well. This is crucial for businesses, where losing data can be very costly. By focusing on system image creation and choosing the right storage, businesses can protect their data and keep running smoothly even in tough times.
How to Restore Computer from System Image: Step-by-Step Guide
To restore your computer from a system image, start by entering the Windows Recovery Environment. You can do this by restarting your computer and pressing F11. Alternatively, use a system repair disc. Once in the Windows Recovery Environment, choose the system image you wish to restore.
The restoration process may take some time, depending on the backup size. It’s important to follow the step-by-step guide closely for a successful restoration. System Image Recovery is a reliable method for restoring Windows systems. It works well for Windows 10 or Windows 11 backups.
Here are the general steps for system image restoration:
Enter the Windows Recovery Environment
Select the system image you want to restore from
Choose additional restore options, such as formatting and repartitioning disks
Wait for the restoration process to complete
It’s wise to keep different versions of system images. This is because older images may be deleted when storage space is low. Users can create system images using backup tools like EaseUS Todo Backup for easier restoration.
System image recovery can erase the system drive, losing files made after the image was created. So, it’s vital to back up important files before restoring your system.
Storage Location
Backup Frequency
Storage Capacity
Local hard drives
Daily
1TB
DVDs
Weekly
4.7GB
Network drives
Monthly
10TB
Accessing Recovery Options in Windows
There are several ways to access recovery options in Windows. You can use Windows installation media, advanced startup options, or system image recovery. These methods help users recover their system if it fails or gets corrupted.
Creating a Windows installation media is a simple way to get started. You make a bootable USB drive or CD/DVD with Windows files. Then, you can boot from it and find recovery options, like restoring from a system image.
Methods for Accessing Recovery Options
Using Windows installation media to boot into the Windows Recovery Environment (WinRE)
Accessing advanced startup options to troubleshoot and recover the system
Locating the system image recovery option to restore the system from a previously created system image
Users can also get to recovery options by setting their system to advanced startup mode. This mode has many tools for fixing and recovering your system, including from a system image.
Knowing how to access recovery options in Windows is key. Whether you use Windows installation media or advanced startup options, you can fix your system quickly. This ensures you’re ready for any system failure or corruption.
Method
Description
Using Windows installation media
Boot into the Windows Recovery Environment (WinRE) to access recovery options
Accessing advanced startup options
Boot into advanced startup mode to troubleshoot and recover the system
Locating the system image recovery option
Restore the system from a previously created system image
Common Challenges During System Image Restoration
System image restoration can help recover your computer after a failure. But, it comes with its own set of challenges. One major issue is that you can only restore the whole image, not individual files. This can be a problem if you need to get back a specific file.
Some common system image restoration challenges include hardware and software problems. To tackle these, it’s key to be ready and have a plan. This means having backups of your important files and knowing how to troubleshoot.
Here are some common issues and their solutions:
No disk that can be used: Ensure the target disk is compatible and has enough space.
0x80070057 Error: Check for incorrect parameters and ensure the disk is not corrupted.
Windows Cannot Restore a System Image: Ensure consistent partition style between source and target disks.
To avoid these common issues, it’s important to follow best practices. Use a reliable backup software, like MiniTool ShadowMaker, and keep the backup safe.
Knowing about the system image restoration challenges and how to prevent them can make recovery smoother. Regular backups and safe storage can help you quickly get back on track after a failure.
Common Issue
Solution
No disk that can be used
Ensure the target disk is compatible and has enough space
0x80070057 Error
Check for incorrect parameters and ensure the disk is not corrupted
Windows Cannot Restore a System Image
Ensure consistent partition style between source and target disks
Ensuring Data Safety During the Recovery Process
When you restore a computer from a system image, data safety is key. You need to back up essential files to avoid losing data. Also, check the system image integrity to make sure the recovery goes well. The system image recovery guide says the backup includes all your computer’s data, like personal files.
To keep your data safe, check the system image integrity before you start. Look for any errors or damage in the system image file. Also, save your essential files on an external hard drive or in the cloud. This adds an extra layer of protection against losing your data.
Here are some important tips for keeping your data safe during recovery:
Choose a trustworthy backup method, like an external hard drive or cloud storage
Make sure the system image integrity is good before you start the recovery
Save your essential files somewhere else
By taking these steps and focusing on data safety, you can have a successful recovery. Regular checks on the system image integrity and backups of essential files give you peace of mind. They help protect you from data disasters.
Post-Restoration Steps and Verification
After you’ve restored your computer, it’s key to do post-restoration steps. This makes sure your system works right. You need to do a system check to see if everything is okay. Also, you should verify that the system image was restored right and all updates are in place.
A system check means looking at the system’s setup and checking for errors. It’s important to make sure all devices are connected and working. This helps find any problems from the restoration. You also need to verify that the system image was restored correctly and all updates are installed.
Some important steps for your post-restoration steps are:
Checking the system for any issues or errors
Installing necessary updates and patches
Verifying that all software and hardware are functioning correctly
Confirming that the system is properly configured
By doing these post-restoration steps and a detailed system check and verification, you can make sure your system is back to normal. And that all parts are working as they should.
Alternative Recovery Methods When System Image Fails
If a system image backup is not available or fails, there are other ways to get your computer back to how it was. You can use system restore points, do a fresh Windows install, or use third-party recovery tools.
System restore points are snapshots of your system at a certain time. They can help fix issues that stop the system image from working.
System Restore Points and Fresh Installation
Another option is to do a fresh Windows install. This means setting up your computer again from scratch. It’s a bit slow but can solve problems that stop the system image from working.
Third-party recovery tools can also help. They are great when the system image backup is missing or damaged.
Choosing the right recovery method depends on your situation and how tech-savvy you are. Sometimes, using system restore points or doing a fresh install is easiest. Other times, you might need third-party tools.
Having a backup plan is key. This includes options like system restore points and fresh installs. It helps ensure you can get your data and system back if something goes wrong.
Maintaining Regular System Images for Future Recovery
Creating regular system images is key to recovering your system in case of a problem. This involves setting up backups and thinking about where to store them. It keeps your system safe and makes it easy to go back to a previous state.
The Windows Backup and Restore tool helps you make system images. It lets you schedule backups automatically. This makes keeping your system images up to date simpler. System image recovery creates a full copy of your hard drive, including everything.
Scheduling Automatic Backups
Setting up automatic backups is vital for regular system images. You can do this in the Windows Backup and Restore tool. Choose how often you want to backup, like daily, weekly, or monthly. Think about how much space you need and what storage to use.
Storage Considerations
When making system images, think about storage. You need enough space and a reliable storage medium. Options include external hard drives, USB flash drives, and network locations. Pick something that’s safe, reliable, and has enough room for your image.
Regular system images protect your system and make it easy to restore. This is crucial for businesses, where downtime can be costly. By setting up backups and choosing the right storage, you keep your system safe and ready for quick recovery.
Storage Medium
Space Required
Reliability
External Hard Drive
Equivalent to system drive
High
USB Flash Drive
Equivalent to system drive
Medium
Network Location
Equivalent to system drive
High
Professional Tips for Successful System Recovery
When dealing with system recovery, it’s vital to follow best practices. Making a system image backup is key. It lets you go back to a previous state if something goes wrong. System image recovery might seem tough, but with the right professional tips, it can be done smoothly.
Important professional tips include making a system repair disc and using a trusted backup tool. Also, check your system image backups for integrity. Always back up your key files before starting the recovery, as it will erase everything newer than the system image.
Using a separate bootable media, like a recovery USB, is helpful if your computer won’t start. By sticking to these best practices and professional tips, you can recover your system well and avoid losing data.
By using these professional tips in your system recovery, you’ll have a smooth process. Always stick to best practices and use reliable backups to safeguard your files and data.
System Recovery Method
Description
System Image Recovery
Restores an entire copy of the PC, including applications, settings, and files
System Restore
Restores system files and settings to a previous point in time
Conclusion: Ensuring Your System’s Safety Through Proper Image Recovery
System safety and image recovery are key to protecting your computer and data. Creating a detailed system image backup helps shield your device from unexpected problems. This includes system crashes or even harmful attacks.
When you restore your computer from a system image, you quickly get back to a safe state. This reduces downtime and keeps your work flowing. It also saves time and protects your important data.
Regular system image backups are a strong defense for your digital world. By using the tips from this guide, you can keep your system safe. Enjoy the peace of mind that comes with image recovery and take care of your computer.
FAQ
What is a system image?
A system image is a full copy of your computer’s setup. It includes the operating system, programs, and data. It helps restore your computer to a previous state if needed.
What are the benefits of using a system image recovery?
System image recovery has many benefits. It can quickly restore your computer to a working state. It also protects your data and makes recovery easier than other options.
When should I use system image recovery?
Use system image recovery when your computer has major problems. This includes system crashes, hardware failures, or malware infections. A full system restore is needed in these cases.
What are the essential prerequisites for starting the restoration process?
Before starting, check if your computer meets the system requirements. Make sure your backup is ready and your data is safe.
How do I create a system image backup?
To create a backup, choose the right storage medium. Decide which drives to include. Follow best practices to check the backup’s integrity.
How do I restore my computer from a system image?
To restore, enter the Windows Recovery Environment. Select the system image to start the process. Follow the guide carefully.
How can I access the recovery options in Windows?
Access recovery options by using the Windows installation media. You can also use advanced startup options or find the system image recovery option directly.
What are some common challenges during system image restoration?
Common challenges include backup issues, hardware problems, and software conflicts. Troubleshooting tips and preparation can help solve these problems.
How do I ensure data safety during the recovery process?
Back up essential files and check the system image’s integrity. This protects your data and ensures a successful recovery.
What are the post-restoration steps and verification processes?
After restoration, check the system for issues. Install updates and ensure software and hardware work correctly. This verifies the successful recovery.
What are the alternative recovery methods if a system image backup is not available or fails?
If a system image backup fails, use system restore points or perform a fresh Windows installation. Third-party recovery tools are also an option.
How do I maintain regular system images for future recovery?
Schedule automatic backups and choose reliable storage options. This ensures your system images are available and reliable for future recovery.
What are the professional tips for successful system recovery?
Follow best practices for creating backups and use reliable solutions. Troubleshoot common issues for a smooth recovery process.
Understanding your device’s software is crucial for smooth performance. Whether installing new programs or troubleshooting issues, having the right operating system details saves time and frustration. Modern software often requires specific versions to function properly. Security updates also depend on accurate system information. Outdated versions may expose your device to vulnerabilities. IT professionals frequently request…
Keeping up with the newest operating system is vital for top-notch digital performance. Windows 11 has become a key player in modern operating systems. It offers innovative features that change how users interact with their computers. The 2024 computer OS market showcases a range of tech advancements. Users look for cutting-edge solutions to boost productivity…
To keep your computer running well, knowing its system information is key. This includes details about its hardware and software, like computer specs. It helps fix problems with programs and shows your system’s power. Knowing your system’s info helps you see its strengths and limits. You can find out about your computer’s specs by visiting…
End-user computing is about the tech used to manage devices, apps, and data for workers. It’s key to information systems. It lets workers access what they need to do their jobs. With more people working from home and using mobile devices, end-user computing is now essential for businesses. Recent stats show 43% of Americans work…
Enterprise resource planning (ERP) is a sophisticated business management software. It revolutionises how organisations manage their operations. This integrated system streamlines critical functions across multiple departments1. Gartner introduced the term ERP in 1990. It described a new approach to managing business operations. Initially for manufacturing, ERP systems now support diverse industry needs12. Modern ERP systems…
A system image serves as a lifeline when your Windows environment becomes unstable or corrupted. This complete snapshot of your drive includes the OS, settings, programs, and files—ensuring a full recovery when disasters strike. Unlike file-level backup, this process reinstates everything at once. Pre-planning is crucial. Regular updates to your system image keep it aligned…